Hario Grinders A beginner’s guide to choose the right Hario grinder (Comparison of features and Grind adjustment settings)

- Why a grinder in the first place? – The importance of having your own grinder
- Why Hario manual coffee grinders instead of others?
- Hario’s Manual Coffee Grinders – Compared
- “Skerton”
- "Skerton Plus" Ceramic Coffee Mill
- "Skerton Pro" Ceramic Coffee Mill
- Mini Slim
- Mini-Slim+ Ceramic Coffee Mill
- Mini-Slim Pro Ceramic Coffee Mill
- Canister Ceramic Coffee Mill
- Smart G Ceramic Coffee Mill
- Dome Ceramic Coffee Mill
- Standard Ceramic Coffee Mill
- Small Ceramic Coffee Mill
- Acrylic Box Ceramic Coffee Mill
- Prism Ceramic Coffee Mill
- Coffee Mill Octo
- Side by Side Comparison of Each Model
- Adjusting the Grind Setting on Manual Hario Coffee Grinders
- How to choose the right Hario manual coffee grinder
Coffee grinders are one of the indispensable tools for anyone who loves coffee as whole coffee beans have to be ground into finer particles for hot water to extract the perfect cup of coffee from the beans. Some of the most popular manual coffee grinders on the market today are made by Hario - a renowned Japanese company that has been making iconic coffee brewing equipment for decades; their coffee pour-over drippers (V60), paper filters, and pouring kettles are icons of modern specialty coffee culture and even make frequent appearances on the stages of Barista championships.

Hario has a wide variety of options when it comes to manual coffee grinders and as much as that is great news for any coffee lover because it means more options to choose from, it can also be a little tricky at times to choose the right type of grinder that will be a perfect match for your coffee brewing style and your personal taste and preferences.
We shall take a comparative look at the grinders, as well as discuss relevant topics so that you have no confusion regarding coffee grinding, different types of Hario grinders, and know how to choose the right one, and also – this is very important- how to set the grind level on your Hario manual coffee grinder. Are you ready to grind some coffee? – Let's get started!
Why a grinder in the first place? – The importance of having your own grinder
Whole coffee beans have to be ground before they can be brewed
Yes, yes, we know. Many seasoned coffee lovers might be thinking that's common sense! However, many of us who are only beginning our journey in the coffee world might not be familiar with the fact that whole coffee beans have to be ground before coffee can be extracted from them. So if you want to start brewing your own coffee at home from scratch, then a coffee grinder is one of the first tools you have to get.
You can control the grind size
Grind size is a very important factor in achieving the perfect cup of coffee. Coffee extraction is directly dependent on the grind size because grind size determines how much of the coffee's surface area is in contact with hot water. The smaller the size of the coffee particles (finer grind size), the greater is the surface area of coffee exposed to water, meaning higher extraction of flavor and taste from the coffee.

To have the grind size match your brewing method is also crucial in making coffee. Simply put, the grind size is different for different coffee brewing methods such as French press, espresso machine, pour-over, Aeropress, etc. If you grind your coffee for French press and try to use it to make espresso coffee, the result will be disastrous!
Once you have your own coffee grinder, you can control the setting on your grinder to grind the coffee to the desired level. This also means that if you have the correct brewing equipment, you can enjoy multiple types of brewing methods even with a single bag of whole coffee beans.
Freshness of Coffee
With the availability of pre-ground packaged coffee, you might be thinking why do I even need a grinder when I can simply buy ground coffee? The answer can be found within the fact that although it is vacuum-sealed, pre-ground coffee can never be as fresh (or as good) as coffee that has been ground from whole beans right before the brewing process. Coffee contains chemical components that are responsible for the flavors and taste in the final cup. Once the coffee is ground, these flavor and taste components start to be oxidized by air very quickly as ground coffee has more surface area exposed to air than whole coffee beans.
With your own coffee grinder, you can grind just the amount you are going to brew, right before the brewing process, ensuring the maximum level of freshness – which also means you will get a lot more flavor and taste in the final cup compared to one brewed from pre-ground coffee.
Makes the coffee experience more rewarding
When the coffee is being ground, it releases a great number of flavor molecules into the surrounding air, and the aroma of fresh coffee being ground is an enjoyable experience in itself, an aspect of the whole coffee brewing process that is not something to be missed.
Why Hario manual coffee grinders instead of others?
Below are the reasons why we chose to focus on Hario manual coffee grinders even though there are so many other options on the market today.
Hario is a well-established brand in the coffee industry
Hario has earned its high reputation in the coffee industry by making durable high-quality coffee equipment for many years. This guarantees that the money you invest in buying a Hario coffee grinder is not going to waste which cannot be said for many other grinders that are on the market. It also means that because Hario is so well-established and widely used all over the world, there are many tutorials and freely available resources and information regarding these grinders in many languages accessible to any Hario user in the world.

Hario manual grinders all use top-grade conical ceramic burrs
There are two main types of mechanisms when it comes to grinders – those that use blades to break down the coffee beans and those that use burrs. Blade grinders, although they are very cheap, should be avoided at all costs. When you choose to buy a Hario coffee grinder, you can be worry-free about the grinding mechanism as all Hario grinders use conical ceramic burrs as a mechanism to turn whole beans into smaller particles for brewing. These are the reason why the ceramic burr mechanism is the best choice for coffee grinding:
-
Uniform grind size: Grinding the coffee by burr mechanism ensures that all the coffee grinds are of uniform size. This is of utmost importance in brewing a great cup of coffee as unevenly ground coffee (mixture of big and small particles) will result in over-and under-extraction, creating unpleasant bitter and sour tastes in the final cup. Uniformly ground coffee also prevents clogging or the creation of unwanted air pockets during the brewing process.
-
Adjustable: By turning the burrs, you can adjust the grind level (we will discuss more of this later) and control the grind size to match your brewing devices.
-
Durability: When it comes to burrs, they can be made from different materials such as ceramic or steel. The burrs of Hario grinders are all made using high-quality ceramic. Ceramic burrs are harder than steel burrs and last about twice as long as steel burrs. Ceramic also does not have the risk of rusting or corrosion.
-
No risk of imparting metallic smell to the coffee: Ceramic burrs are smell-free and rust-free so there is no risk of imparting any unwanted smell to the ground coffee which is a concern in the case of metallic grinders
-
Minimal heat release: When coffee is being ground, it involves mechanical parts moving against each other, which means there is a level of heat being released. If this heat release is too high, it can affect the flavor and taste components of the coffee being ground. As ceramic burrs are less thermally conductive than metal or steel, the chances of heat being released affecting the coffee beans are minimal.
Hario grinders are some of the most cost-effective grinders for small-scale coffee brewing
Hario manual grinders are all within the $100 range and within this price, Hario grinders offer the same precision and grind uniformity similar to more expensive commercial burr grinders. If you are looking for a manual coffee grinder that will allow you to grind coffee for making one to a few cups of coffee, investing in a Hario grinder is the wisest choice because of the level of quality that can be found in these is unrivaled.
Manual grinding makes you directly involved in the coffee-making process
Some of us might feel like it is too time-consuming and troublesome to use a manual grinder instead of an automatic one. However, manual grinding allows you to feel more directly involved in the process, making your whole coffee experience more rewarding than the electric grinder. With a manual grinder, instead of simply pressing a button, you are actually turning the handles and 'feel' the burrs grinding the coffee beans, smelling in the delicious aroma being released from the coffee. Manual coffee grinders are also less noisy than automatic grinders.
Great design options to choose from
Hario is a company that has won many prestigious design awards. Hario’s coffee equipment are well-known for their elegant, simplistic, and highly user-friendly designs. Their manual grinders all represent these highly desirable characteristics of Hario’s design.
Hario’s Manual Coffee Grinders – Compared
“Skerton”
Hario’s “Skerton" series has become one of the most popular small-scale manual coffee grinders among coffee lovers. When Hario released their first “Skerton” coffee grinder, it worked very well for medium to fine grind, but many french press coffee drinkers were disappointed because it didn’t produce consistent size particles on the coarse settings. Then in the summer of 2017, “Skerton Plus” was released. It was base model Skerton upgraded with a pre-installed base stabilizer plate that stabilized the movable burrs on the coarse settings to help produce a better grind for use in french press pots and percolators.
Unfortunately, many people thought the stabilizer plate was still not good enough to keep the burr steady. So the Hario design team deviced a new design which they released in the fall of 2017 called the “Skerton Pro”.
"Skerton Plus" Ceramic Coffee Mill

Notable Features
-
It has a stabilizing plate that keeps the lower burr steady during grinding, which helps to improve grinding at coarser levels, increasing uniformity, and reducing the force needed to turn the handle
-
The hourglass shape of the grinder and the silicone rubber non-slip base makes it stable and secure when grinding
-
Comes with a separate lid for the grind container that allows the ground coffee to be stored for later use or to be carried safely and easily
-
The lid for the beans hopper is made of silicone rubber so it is pliable
Possible cons
-
Many users have felt that the coarse grind was still not consistent enough so Hario has created an upgraded it to “Skerton Pro”
-
The grind adjustment is a bit tricky and can take a while to get a hang of as you have to remove the lid, dismantle it and locate the ring that adjusts the burr grind.
"Skerton Pro" Ceramic Coffee Mill

Notable Features
-
The grind consistency and uniformity for coarse grinds have been further improved from the preceding Skerton Plus, which makes it THE Hario grinder to get if you grind your coffee coarse.
-
Easy and user-friendly grind adjustment. The grind settings can be changed simply by turning a ring below the burr (no need to dismantle the whole thing) that ‘clicks’ into your desired setting.
-
It looks more premium than its predecessors in the Skerton series with a sturdier-looking and more well-balanced overall hourglass design.
-
The handle has been upgraded from its past version to be more durable and is made with die-cast aluminum
-
It has a non-slip rubber part at the base as well as around the collection jar so it is secure and stable to work with
-
It has a high grinding speed. It can grind 27 grams of coffee beans in approximately 99 seconds. The finest grind (for espresso) takes about two minutes, which is still quite fast for a manual grinder.
Possible Cons
-
The lid for the beans hopper is not pliable rubber but hard, transparent plastic. Unlike silicone, if it is dropped from a height, it might crack.
Mini Slim
Hario’s Mini Slim series has two versions – Mini-Slim+ and an upgraded Mini-Slim Pro. As the name suggests, the highlights of this series are that they are slim and 'mini', perfect for being carried around with you whether it be to the office, camping, or on a trip. The size and shape of the Mini-Slim grinders are similar to that of a large pepper grinder, and their maintenance, use, and cleaning are also very easy and simple. If a portable and lightweight manual grinder is what you are looking for, then it will be worth looking into this series.
Mini-Slim+ Ceramic Coffee Mill

Notable Features
-
Sleek and slim design makes it stylish and highly portable
-
Simple grind adjustment can be done easily by turning the nut below the burr without having to dismantle the functional parts
-
The reinforced hexagonal handy lock adapter handle makes the grinding process steadier
-
The grind collecting part is made of Methacrylate resin, which is a lightweight, durable, and shatter-proof thermoplastic
-
The grind collecting part is semi-transparent with user-friendly markings that show how much coffee is inside the collector
-
The bean hopper has a lid to prevent spillage
Possible Cons
-
No anti-slip base
-
Low capacity might not be practical for making coffee for multiple people
Mini-Slim Pro Ceramic Coffee Mill

Notable Features
-
Slim, sleek, and compact design
-
The stainless steel body (comes in black and steel colors) makes it look sleeker and more durable.
-
The handle has been upgraded to a tougher and sturdier die-cast aluminum handle
-
Simple grind adjustment can be done easily by turning the nut below the burr without having to dismantle the functional parts
Possible Cons
-
Low capacity
-
The grind collection part and the beans hopper both are opaque so you cannot see the grind size from outside
Canister Ceramic Coffee Mill

Notable Features
-
It is an integrated grinder and storage canister so the freshly ground coffee can be conveniently stored in an air-tight condition
-
It comes with a cork stopper that can be removed during grinding and put back on for storing, ensuring an air-tight condition for preserving the freshness of coffee while storing.
-
It has a high capacity of holding 120g ground coffee, which is higher than the Skerton series
-
The wooden lid and the handle knob, along with the latch-style canister and bronze-toned beans hopper give it a unique vintage and rustic beauty.
-
The base has a silicone rubber anti-slip cover that secures and stabilizes the grinder while grinding
Possible Cons
-
The adjustment of the grind setting is quite time-consuming and requires getting used to
-
Due to glass and wooden parts, it is heavier compared to other Hario grinders
-
The handle can be removed but the beans hopper is permanently attached to the canister lid
Smart G Ceramic Coffee Mill
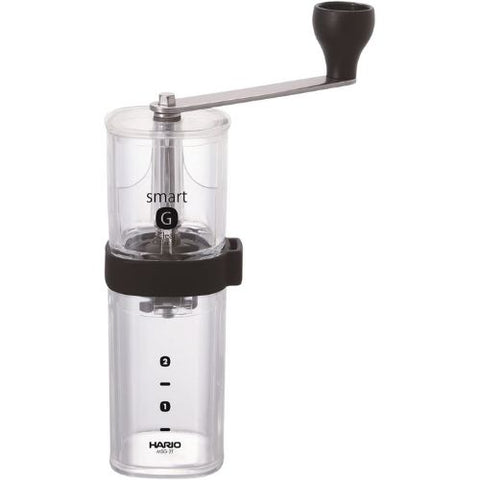
Notable Features
-
Super compact, slim, and lightweight design makes it the perfect grinder for travel
-
It comes in two different color options – transparent and transparent black to choose from
-
The collection bottle has easy to read scale markings so you can tell how much coffee has been ground at a glance - (1) is 12g, and (2) is 24g
-
Easy and simple ‘twist and click’ grind setting adjustment (no need to dismantle)
-
Long, removable handle for effortless grinding
-
The body is made of Methacrylate Resin, a durable and shatterproof thermoplastic
Possible Cons
-
No anti-slip base and the somewhat straight overall shape might offer enough stability when grinding
-
Low capacity
Dome Ceramic Coffee Mill

Notable Features
-
Vintage design featuring a compact wooden body, a wooden handle knob, and a dome-shaped steel beans hopper
-
The center of the wooden body has been tapered to provide a comfortable and stable grip when grinding
Possible Cons
-
The beans hopper have a door-style opening from where the coffee beans are inserted, which might be a bit cumbersome to use
-
The grind setting adjustment requires the functional parts to be dismantled and takes time
-
The grinds container part is not washable as it is made of wood
Standard Ceramic Coffee Mill

Notable Features
-
A retro design featuring nostalgic drawer-style grind collection compartment made of wood
-
Well-made steel crank handle with a wooden knob
-
The rectangular design and a low elevation stand at the base makes it stable and secure when grinding
Possible Cons
-
No lid for the beans hopper so beans might fall off when grinding
-
Very low capacity (10g)
-
The container part cannot be washed as it is wooden
-
The grind adjustment requires the functional parts to be dismantled
Small Ceramic Coffee Mill

Notable Features
-
A retro antique design featuring nostalgic drawer-style grind collection compartment made of wood
-
Well-made steel crank handle with a wooden knob
-
The beans hopper has a lid to stop beans from falling off when grinding
-
The small size makes it more compact than the other retro-style Hario grinder
Possible Cons
-
The stand-less design and the small size of the collection compartment do not provide much stability when grinding
-
The grind adjustment setting requires the parts to be dismantled and can take time to get used to
-
The wooden parts are not washable
Acrylic Box Ceramic Coffee Mill

Notable Features
-
A unique avant-garde design with a transparent rectangular box-like shape.
-
The whole body is made with shatterproof Methylacrylate resin, a shatterproof and durable thermoplastic.
-
The grinder has a dedicated space inside where the handle can be stored safely. This special feature combined with the narrow shape of the grinder allows compact storage when not in use, and also, the handle will never get lost!
-
The grind collection compartment is drawer-style with an ample capacity of 40g.
-
It has a special mechanism at the base through which the mill can be secured to a counter or tabletop by engaging the side lever to deploy the suction cup. This adds stability allowing for even cranking and grind consistency.
-
The handle is made from stainless steel making it more durable.
Possible Cons
-
The grind adjustment setting requires dismantling the functional parts and may take a while to get used to.
Prism Ceramic Coffee Mill
Notable Features
-
This grinder has an extremely user-friendly, compact, and durable design. The body is made with Alumite-treated aluminum (aluminum alloy) for a sturdy build with a smooth feel and sleek look.
-
The slim rectangular shape makes it very compact and easy to grip when grinding.
-
It offers two color options – black and silver.
-
The hopper part and the container part are attached with spring-loaded ball-bearings so they attach securely and can be detached easily with a gentle push.
-
The handle is made with die-cast aluminum and can rest on the lid at a stable position when not in use, allowing compact storage.
-
The grind adjustment is quick and easy as it can be done by the 'twist and click' mechanism of the nut below the burr. No need to dismantle the functional parts.
-
The beans hopper has a lid to prevent beans from spilling.
-
The base is lined with silicone rubber to prevent slipping, ensuring stability when grinding.
Possible Cons
-
Low capacity (24g)
-
Small opening for putting beans into the hopper
-
The whole body is opaque so the grinds are not visible from inside
Coffee Mill Octo
Notable Features
-
A beautiful crystal-clear body made with MS resin, a durable plastic that provides excellent transparency
-
The octagonal hourglass shape of the grinder makes it easy to grip onto when grinding and promotes stability
-
The grind setting can be done by a quick adjustment ‘twist and click’ mechanism below the burr so no need to dismantle the functional parts
-
The twisting nut for the grind adjustment is labeled with ‘fine’ and ‘coarse’ markings so you know at a glance which way to turn the nut without any guesswork
-
A good capacity of 36g
Possible Cons
-
The body is made of MS resin, which is durable enough for daily use but not as shatterproof as metal or other plastic variations of Hario grinders so care should be taken to not drop it from a height
-
No Anti-slip base
Side by Side Comparison of Each Model
It is hard to see on the screen, so we created a PDF of this chart which you can download it here.
|
|
Size (mm) (W x D x H) |
Capacity (Coffee Grounds) (grams) |
Lid for grinds container |
Anti-slip base |
Setting style |
Grind container style and material |
Price |
|
172×93×231 |
100 |
Yes |
Yes |
Requires dismantling of the burr parts. Can take time and practice to get used to. |
Round lower jar made from heat-proof glass |
$50.00 |
|
|
167×95×195 |
100 |
Yes |
Yes |
User-friendly ‘clicking’ adjustment below the burrs |
Round lower jar made from heat-proof glass |
$57.50 |
|
|
150×72×220 |
24 |
No |
No |
User-friendly ‘clicking’ adjustment below the burrs |
Slim shaped container made from shatterproof transparent acrylic (plastic) |
$40.00 |
|
|
150×74×210 |
24 |
No |
No |
User-friendly ‘clicking’ adjustment below the burrs |
Slim shaped container made from steel |
$62.50 |
|
|
208×105×215 |
120 |
Yes |
Yes |
Requires dismantling of the burr parts. Can take time and practice to get used to. |
Soda-lime storage canister with wooden lid |
$59.50 |
|
|
150 × 53 × 190 |
24 |
No |
No |
User-friendly ‘clicking’ adjustment below the burrs |
Slim-shaped container made from shatterproof transparent acrylic (plastic) |
$47.50 |
|
|
143×88×208 |
35 |
No |
No |
Requires dismantling of the burr parts. Can take time and practice to get used to |
Tapered wooden container |
$39.50 |
|
|
148 × 98 × 210 |
10 |
No (Drawer Style) |
No (rectangular wooden base so it is not needed) |
Requires dismantling of the burr parts. Can take some practice and time to get used to. |
Traditional Drawer-style wooden rectangular compartment |
$47.50 |
|
|
160 × 100 × 185 |
24 |
No (Drawer style) |
No |
Requires dismantling of the burr parts. Can take time and practice to get used to. |
Traditional Drawer-style wooden rectangular compartment |
$53.50 |
|
|
83 × 75 × 175 |
40 |
No (Drawer-style) |
Yes (Counter-Top Suction Plate) |
Requires dismantling of the burr parts. Can take time and practice to get used to. |
Transparent shatterproof thermoplastic rectangular body with drawer-style |
$64.50 |
|
|
Prism Ceramic Coffee Mill |
|
24 |
No |
Yes |
User-friendly ‘clicking’ adjustment below the burrs |
Slim rectangular body made of aluminum alloy |
$62.50 |
|
Coffee Mill "Octo" |
157 × 70 × 213 |
36 |
No |
No |
User-friendly ‘clicking’ adjustment below the burrs |
Octagonal hourglass body made of MS resin |
$45.50 |
It is hard to see on the screen, so we created a PDF of this chart which you can download it here.
Adjusting the Grind Setting on Manual Hario Coffee Grinders
One of the most crucial things about coffee grinders is the grind adjustment setting. This is how you set the grinder to break down the coffee beans to your desired level of fineness or coarseness. Every coffee brewing method has its own perfect grind size (coffee grind particle size) and without getting this grind size right, it is impossible to brew a great cup of coffee whether you are using a French press, percolator, mocha stovetop, pour-over, espresso machine, or any other coffee-making method of your choice. Even within the same coffee brewing method such as pour-over, you might want to change the grind size depending on the coffee or roast type, or your pouring technique. Bottom line, it is absolutely essential to know how to change the grind settings no matter what kind of grinder you have.

For Hario's manual coffee grinders, there are two types of grind adjustment methods. We will look at both the types and also tell you which grinder follows which type, so that you know which adjustment method is the one for the grinder of your interest.
-
The dismantling type: The first type requires the functional parts to be dismantled, which allows the setting on the burr to be adjusted and then the parts to be re-assembled again. This type takes time and practice to get a hang of and many users have expressed that it is a bit of work. That being said, if you are a serious coffee lover determined to get to the bottom of it all, don't be intimidated! Once you are used to it, it is quite easy and very much practical. And the best part is that you can feel confident as you will have a good knowledge of how your grinder works and you have full control of grind size within your grasp.
-
“Twist and Click” type: As many users have expressed their frustration with the first type of grind setting adjustment, Hario has equipped many of their manual grinders with this ‘twist and click’ type of grind setting adjustment. For this type, all you have to do is turn a small nut which is located below the burr. Every time you turn or ‘twist’ the nut, you can hear a ‘click’ and this means the grind size is going one notch finer or coarser depending on which way you are turning – clockwise or anticlockwise. This type is very quick and easy as you do not have to dismantle any functional parts.
Before deep diving into the details of each method, let's look at which Hario grinder follows which method.
|
Type 1 ( Dismantling type) Requires the parts to be taken apart and re-assembled Is a little tricky Takes more time and practice to get used to |
Type 2 ( Twist and Click) Very easy No dismantling required Fast |
|
Prism Ceramic Coffee Mill |
|
|
Coffee Mill "Octo" |
How to adjust the grind setting for grinders in Type 1 (Dismantling Type) Category
We applaud the brave and determined coffee lovers who decided to go for the Hario grinders in this category as this grind setting mechanism is often perceived as time-consuming, tricky, and cumbersome. However, we think that for true coffee lovers, this is just another fun and rewarding aspect of coffee making and once you get used to it, you will find it to be pretty fast and easy. So let's get down to it!
To begin with, this method requires the functional parts within the grinding system to be dismantled and then reassembled again. These parts are contained within the bean hopper compartment of the grinder. It is very important to have a clear idea of these parts as the order in which the parts are re-assembled again is crucial to the proper functioning of the grinder. Also, if you have a clear idea of all the parts involved, there will be less chance of you losing one of the parts.
The parts involved:
-
Bean hopper ( the bottom ceramic burrs is attached to the base of the beans hopper)
-
The top ceramic burr attached to the narrow and long shaft
-
Small and transparent washer (be careful not to lose it as it is small and transparent, it can be lost easily)
-
The adjustment nut
-
The nut stopper
-
The handle
-
The fixing cap
For the adjustment, start by disassembling all the parts and keep them close to you on a clean surface with good visibility so that you don’t lose any of them.
Then start assembling.
-
Insert the shaft through the bean hopper so that the shaft is coming out through the center of the bean hopper.
-
Place the bean hopper facing upwards.
-
Place the washer through the shaft
-
Then slide the adjustment nut through the shaft on top of the washer. Screw the adjustment nut securely, but be careful not to make it too tight. Once the nut is secure, don’t crank or twist the nut as this is the ‘zero’/ ‘starting’/ ‘reference’ position of our grind setting.
-
Important: Take a marker and make a line mark on one of the notches (the indentation between the cog teeth of the nut) of the 'adjustment nut' and take this line a little further to the shaft part so that the marker line on the 'adjustment nut' and the marker line on the shaft are aligned. This line will show the 'zero position' we can refer to every time we change the grind setting.
-
Then place the nut stopper on top of the adjustment nut. The nut stopper has a certain position which is the only position it will slide through the shaft and fit onto the adjustment nut.
-
Then slide in the handle on top of the nut stopper.
-
Hold the handle slightly and tighten down the fixing cap on top of it.
-
Make sure to not wrench any of the parts down while you are assembling them. Be gentle and once a part is fairly secure, move on to the next part.
Below is a simplified diagram showing all the parts involved and their assembly
This was the basic and correct way to assemble the parts involved in the grind adjustment setting. Don't forget, we have not done any 'adjustment' yet. At this point, the grinder is set at the 'starting' or 'zero' position. Now let's look at how we can 'change', ‘choose’ or ‘adjust’ the grind setting.
-
Remove the fixing cap from the top of the handle. If you rotate the fixing cap or the 'fixing nut' counterclockwise, it will easily come off.
-
Then remove the handle.
-
Next, remove the ‘nut stopper’ (the stopper that was holding the ‘adjustment nut’ in place.
-
At this point, you can see the adjustment nut at the zero position with a marking that we made before on one of its notches aligned with the marking on the shaft.
-
From here, you can start to turn the adjustment nut clockwise (to the right) or counterclockwise (to the left).
-
If you turn it to the right (clockwise), it makes the grind finer (smaller coffee particles)
-
If you turn it to the left (anticlockwise), it makes the grind coarser (bigger coffee particles)
-
Important :
Notch
Is there a way to keep track of how many levels or how much we are turning the adjustment nut? This is where the marking we made earlier to label the reference point comes in handy. As you turn the adjustment nut, you can see the mark moving away from the aligned marking on the shaft. So you can practically see how many notches it has moved away from the marking on the shaft. This is how we ‘count’ how many notches we are going to the right or left, which also tells us how fine or coarse we are going from the reference point.
The relation between grind size and the notch
Every time you turn the nut one notch to the right or left, we suggest you flip the grinder and take a look at the two burrs that are responsible for grinding, so you can have a practical understanding of how the two are related. The more notches you turn to the finer side, the closer the two burrs are, with less and less space between them. Less space between the burrs means only the finer coffee grinds will pass through, which ensures that the grind is getting finer. The more notches you go towards the coarser side, the two burrs will be further apart with plenty of space between them, meaning the larger coffee particles can also pass through, making the grind coarser.

Notches and Grind Levels
Below, we have a table that tells you how many notches you have to move from the zero reference point to achieve your desired grind setting. However, it is important to take a mental note that this is a generalized chart and this can vary depending on factors like bean type, how old the grinder is, the surrounding weather conditions, etc. Feel free to use this chart as a guide, but to achieve perfection, it is best to experiment and play around with your own Hario grinder as much as possible.
|
Grind level |
Brew Method/Equipment |
Number of Notches moved to turn from the zero reference point |
|
Fine Grind |
Espresso, Moka Pot |
1 |
|
Medium-Fine Grind |
Aeropress, Pour-over |
2 |
|
Medium Grind |
Drip, Pour-Over |
3 |
|
Medium-Coarse Grind |
Clever, Chemex |
5 |
|
Coarse Grind |
French Press, Cupping |
7 |
-
Once you have turned the right number of notches from the zero point to match your desired grind level, place the ‘nut stopper’ on top of the adjustment nut.
-
Then slide in the handle, followed by the fixing cap. And you’re ready to grind!
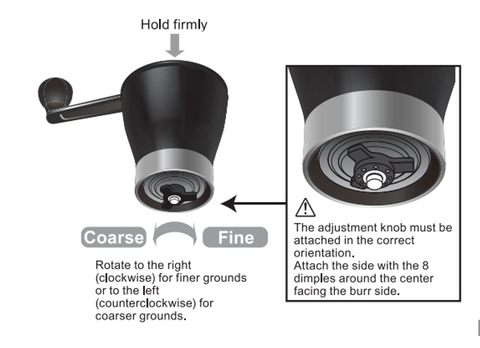
How to adjust the grind setting for grinders in Type 2 (Twist and Click) Category
First of all, below are some points to keep in mind before starting the adjustment. These points are common to all the grinders that use this Type 2 twist and click mechanism.
-
The adjustment nut is located at the base of the grinder. If you separate the hopper and the grind collection compartment and then flip the hopper, you will easily locate this nut at the bottom.
-
If you rotate to the right (clockwise), it makes the grind finer (smaller coffee particles)
-
If you rotate to the left (anticlockwise), it makes the grind coarser (bigger coffee particles)
-
This is very important: The handle must be attached in place (the way it would be attached when grinding) when the adjustment nut is being turned. Hold the center of the handle firmly with one hand and turn the adjustment nut with your other hand.
-
The grind adjustment nut should be attached in the correct orientation – The side with the 8 dimples around the center should be facing the burr side.
Now, the steps:
-
Locate the adjustment nut at the base of the beans hopper
-
Then turn the grind adjustment nut clockwise (turn right) as tight as it goes. This tightest clockwise position will be your starting point or reference point.
-
Next, adjust the grind settings by turning the nut counterclockwise (turn left). Each time you turn the nut, you will feel and hear the 'clicks'. Keep a count of the number of these clicks and you can use this number of clicks as a reference for your settings. In other words, you are starting from a completely closed position and are loosening the nut when you turn it counterclockwise.(Remember to hold the handle in place when turning!)
-
Once you have done the desired number of 'turn and click', you are ready to put the hopper and the grind collection compartment together again, pour in some beans into the hopper, and start grinding!
Below is a general reference guide for ‘twist and click’ grind settings. When you are referring to the chart below, it is important to know that this is a very simplified and generalized chart. Depending on many factors such as the bean type, roast type, how old your grinder is, the weather condition, etc. the number of clicks can vary for each setting.
That is why the best way to get the setting perfected is trial and error, and lots of experimenting with your grinder. Grind a small portion of beans and then feel and see the grind size with your eyes and hands, also try brewing the grinds to really understand the relationship between the clicks and grind size for your particular grinder.
|
Type |
Number of Clicks |
|
Standard Drip Brew |
10 Clicks |
|
#2 Pour over |
10 Clicks |
|
Aeropress |
6-8 Clicks |
|
Espresso |
5 Clicks |
|
French Press |
12-14 Clicks |
|
Moka Pot |
9 Clicks |
|
Chemex |
9 Clicks |
Also,
|
Type |
Number of Clicks |
|
Medium Fine |
8 Clicks |
|
Medium |
10 Clicks |
|
Medium Coarse |
12 Clicks |
Below we also put three pictures from Hario manuals for three different Hario grinders (Skerton Pro, Mini-Slim Plus, and Octo) with the same ‘Twist and Click’ mechanism. As you can see, the basic concept of the mechanism is the same for all the grinders in this category. We also hope that the pictures will give you a clear idea of the orientation of the nut as well as where on the grinder to locate it.
Hario Skerton Pro

Mini-Slim Plus
“Octo” Ceramic Mill

How to choose the right Hario manual coffee grinder
With so many Hario coffee grinders, each with its own fascinating design and attractive features, we coffee lovers are surely spoilt with choices. However, it is important to be able to choose the coffee grinder that will be the perfect match for us so that we can make the best use of the grinder and brew the perfect cup of coffee every day. Below are some factors that will help you to decide which Hario grinder is the right fit for you.
Design and Aesthetics
The overall design of the grinder is very important as it determines whether the grinder matches your personal style and preferences, as well as how practical it is for your daily surroundings. You can choose the coffee grinder that will match your kitchen or café interior the best or the design that speaks the most to your style. Some examples of Hario manual grinder’s styles and aesthetics are as below:
-
Standard, functional, and minimalistic design: Skerton series, Mini-Slim series, Smart G.
-
Antique and retro feel: Standard Ceramic Coffee Mill, Dome Coffee Mill, Small Ceramic Coffee Mill
-
Avant-garde, futuristic and sleek: Acrylic Box Coffee Mill, Prism Coffee Mill.
Capacity
Do you usually brew coffee for just yourself or for your family members as well? How much coffee do you brew per session? These are questions related to capacity. The beans and grind collection compartment have their own capacities but it is usually labeled as the grind collection compartment capacity. For Hario coffee grinders it can range from as little as 10g to as plenty as 40g. It should also be noted that a larger capacity doesn’t mean better. If you have too much coffee leftover in the grinder without being used, it is just going stale and losing its freshness. Think of how much coffee you use per brewing and then decide on the right capacity. Below are some of the capacity ranges for Hario grinders for a quick comparison.
-
Lowest capacity (10g – 25g): Smart G, Mini-Slim Plus and Mini-Slim Pro, Small Ceramic coffee mill, Standard ceramic coffee mill, Prism.
-
Mid-range capacity ( 25g – 40g): Acrylic box, Dome, Octo
-
High capacity (40g – 120g) (Although it says high, it is high in comparison to other small-scale grinders and it does not mean it is high enough for bulk grinding): Skerton series, Canister Ceramic Coffee Mill
Size, compactness, and portability
You might be looking for a grinder to accompany you on your short business trips, or a grinder to use inside your kitchen, or a grinder you can take with you every day to your café. No matter what the purpose is, how big the grinder is, and how compact the design is important. Also, the weight of the grinder plays a role in how easily portable it is. Some questions you might want to ask are – can the handle be stored in a compact style? How slim is the design? Is it lightweight enough? And so on.
-
Extremely compact, portable, and travel-friendly: Mini-Slim series, Smart-G, Prism,
-
Moderately travel-friendly: Octo, Skerton series
-
Not portable or travel-friendly but makes a great countertop piece: Canister, Standard and Small Hario ceramic coffee mills, Dome, Acrylic box
Stability
Stability is a major factor both for when the grinder is being used and also when it is stored on the shelf. The more stable the grinder is, the easier it will be for you to crank the handle of the grinder. Some important factors that play an important role in the stability of a grinder:
-
The overall shape: Hourglass and rectangular shapes as well as a wider base compared to the top are all good for increasing stability.
-
Anti-slip base
-
Anti-slip grip part on the body
Below are the Hario grinders and some factors that contribute to their stability
-
Highly stable (has an anti-slip base and stability-promoting overall body shape):
Skerton series, Canister, Standard Ceramic coffee mill, Acrylic box, Prism
-
Moderately Stable (no anti-slip base but has a well-balanced shape):
Mini-Slim series, Dome, Octo
-
Poor stability: Small ceramic coffee mill, Smart G
Grind Adjustment Settings
We have elaborated on this factor in an earlier section, but simply put, Hario has two types of grind adjustment settings – one is an easy ‘twist and click’ mechanism and the other is a more time-consuming and tricky method where the functional parts have to be dismantled.
-
Type 1 grind adjustment settings (requires dismantling and is a bit time consuming)
Skerton Plus, Canister, Dome, Standard and Small Ceramic Coffee Mill, Acrylic Box
-
Type 2 grind adjustment settings (Easy and quick ‘twist and click’)
Skerton Pro, Mini-Slim series, Smart G, Prism, Octo
Grind consistency and uniformity
All Hario manual grinders use conical ceramic burrs as their grinding mechanism, which ensures very consistent and uniform grinding compared to steel or blade-style grinders. That being said, there are small tweaks and upgrades made in some Hario grinders such as being loaded with a spring, addition of a stabilizing plate, etc. which make the grinding even more consistent.

It is harder to maintain the grind consistency the coarser you grind, and some Hario grinders such as Skerton Pro have been modified specifically so that they ensure a very high level of grind consistency even at the coarser settings. This is a tricky factor as it is not stated directly by the manufacturer, and more dependent on user experience. If you are someone who makes coffee primarily by French press or percolator, it would be best to go with the Skerton Pro.
Washable or Not
For all Hario manual grinders, the functional parts involved in grinding such as the washer, burrs, and the shaft can be taken apart and be washed. However, it is not the same for the outer body parts such as the grind collection compartment. The ones made with plastic and glass are usually washable but not the ones made from wood.
-
Washable body: Skerton series, Mini-Slim series, Canister, Smart G, Acrylic box, Prism, Octo
-
The body is not washable but can be cleaned with a brush or a dry towel:
Dome, Small Ceramic coffee mill, Standard ceramic coffee mill
Type of material it is made from
This plays a major role in determining the portability, durability, aesthetics, and longevity of the grinder. Most of the Hario manual grinders' handles are made of either die-cast metal or steel. The steel ones are lighter but the die-cast metals are more durable, sturdier, and provides more stability when cranking. The body material can vary widely such as glass, MS Resin, plastic, wood, stainless steel, etc. so you have a good range of options to choose from depending on how often and how roughly you use your grinder, and also what kind of style you prefer. Let’s look at how the body of Hario grinders vary according to materials used to make them.
-
Glass: Skerton series, Canister
-
Aluminum alloy: Prism
-
Stainless Steel: Mini-Slim Pro
-
Wood: Dome, Small ceramic coffee mill, Standard ceramic coffee mill
-
Plastic: Acrylic box, Mini-Slim plus, Octo, Smart G
Final Words
With everything we have discussed today, we hope that coffee lover all over the world will be able to choose the perfect Hario grinder that matches their unique coffee-making style and also be able to use that grinder to its full potential to create the perfect
FAQs about HARIO Coffee Grinders
Manual or electric grinder — which should I get for home use?

Related products


37 reviews
USD $42.00
USD $39.00
/
Quick view
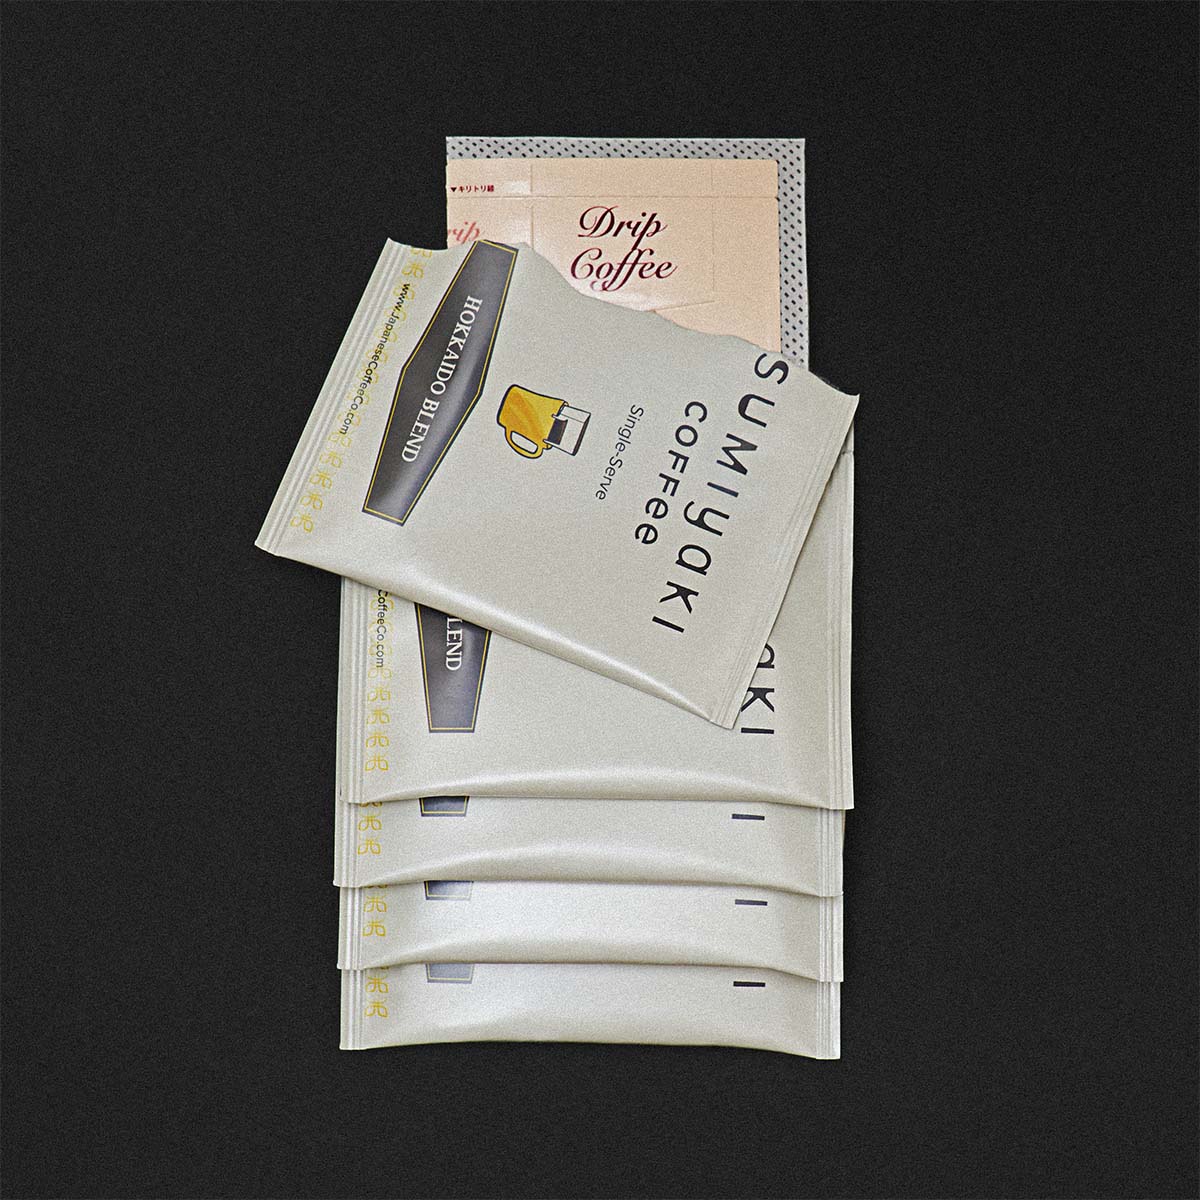
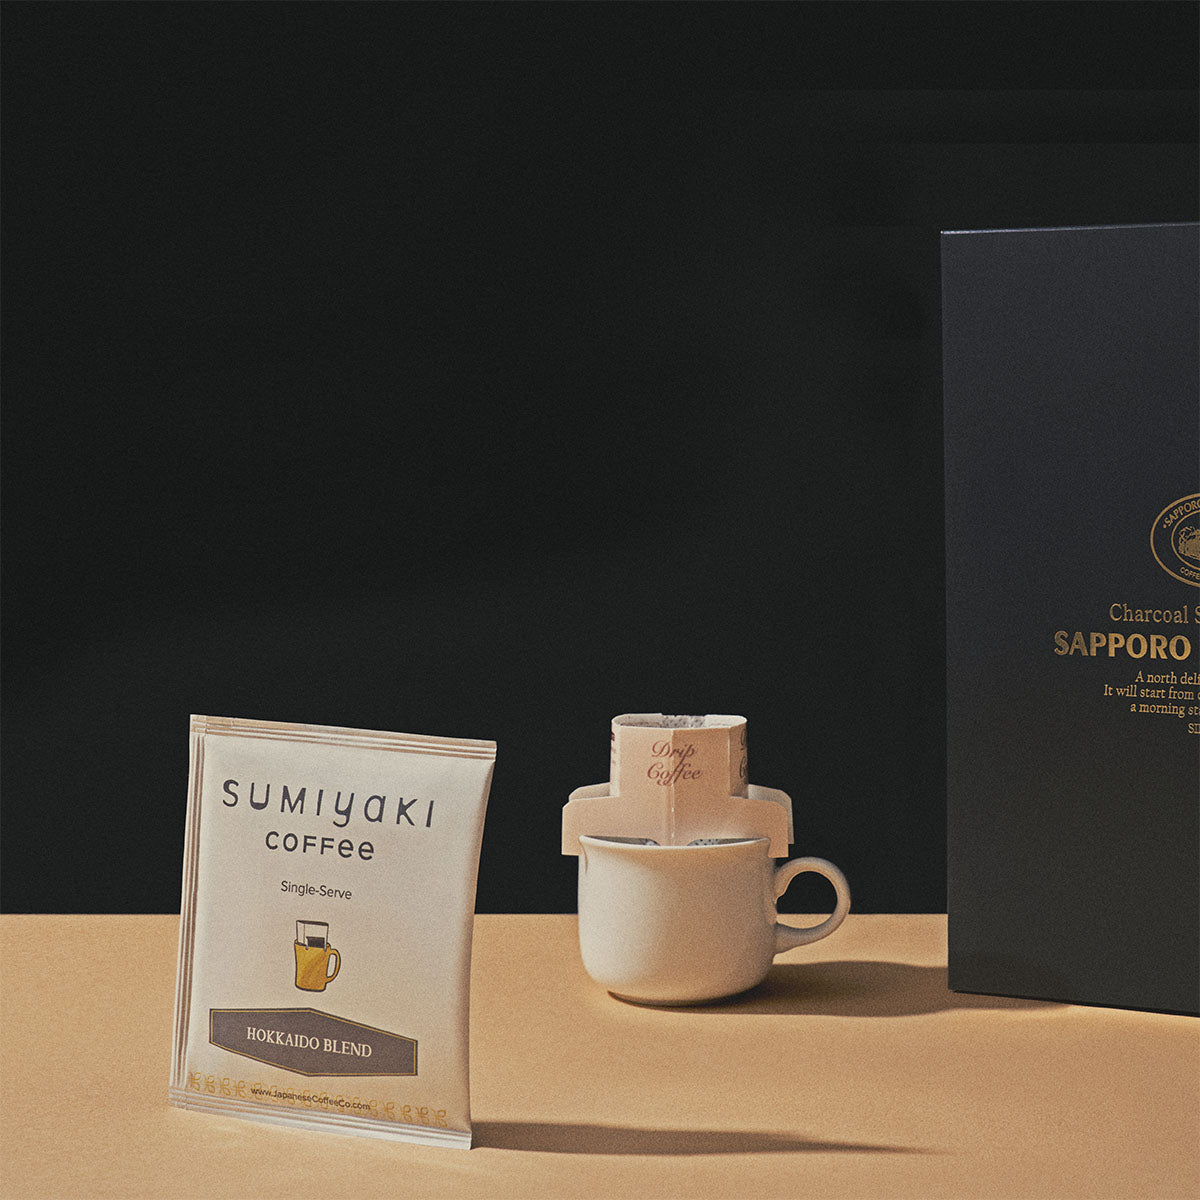
Hokkaido Blend Single-Serve Pour-Over - Disposable Filter Bag


• Disclosure: I only recommend products I would use myself, and all opinions expressed here are my
own. This post may contain affiliate links that I may earn a small commission at no additional cost to you.
The commission also supports us in producing better content when you buy through our site links.
Thanks for your support.
- Kei and Team at Japanese Green Tea Co.


Get Free Bonus Books

Sign up for free to the Coffee Club to get advice and exclusive articles about how to choose Japanese Coffee, and tips, tricks, and recipes for enjoying Japanese coffee.
About the author

Kei Nishida
Author, CEO Dream of Japan
Certifications: PMP, BS in Computer Science
Education: Western Washington University


