- What is “Nel Drip Coffee”?
- Features of Nel Filter
- Things to consider when buying
- What it is like to use the HARIO Nel drip set
-
How to use Nel Drip (suggested measurement)
Grind Recommendation for Hario Nel Drip
Hario Nel Drip 480ml
Hario Nel Drip 240ml - How to clean and store your Nel drip filter after it has been used for brewing
- A simple, easy guide to Nel Filter maintenance
- Using Ziploc to preserve the wetness of the filter
- More Videos about HARIO Nel Drip
Why HARIO is absolutely recommended for the first time Nel drippers
- The Nel is exceptionally thick
- The conical shape allows a smooth pour
- The wooden handle is aesthetically pleasing and stylish
- HARIO is highly stabilized
- Results in a full and rich cup of coffee
What is “Nel Drip Coffee”?
In today's world, the options are endless when it comes to choosing how to brew your favorite cup of coffee. Nel Drip coffee brewing method would be the perfect choice for you if you like your coffee to be full-bodied yet at the same time be of a smooth, velvety texture combined with rich flavor and an unrivaled clarity of taste.
Nel drip coffee, as you might have guessed is a manual brewing method that originated in and has been traditionally used in Japan, although it is becoming widely popular all over the world nowadays. The word “Nel” is an abbreviated form for “flannel” referring to the cotton flannel filter that is used instead of a paper or a metallic filter.
The device used for the process has a unique design – a glass carafe with a wooden collar, a flannel cotton filter, a wire ring with a wooden handle to support the filter. Due to the design, you might sometimes find the device to be called "Nel pot” or “Woodneck dripper.
Nel Drip is also the only method used by all the cafes at our roaster, Sapporo Coffee Kan. You can see all our cafes by clicking here.

As mentioned before, Nel drip coffee has been used in Japan for a long time; one example is the presence of Nel drip coffee devices in a special type of classic Japanese coffee houses called Jun-Kissa (meaning Pure-café, as they do not serve alcoholic beverages) that were founded during the Showa period but are regaining popularity again these days. Due to its attachment to history, nostalgia, and tradition, a Nel drip pot can not only be a device for you to brew a delicious cup of coffee but also a way to add an air of sophisticated charm to your modern coffee brewing space - be it home or a café.
Now that we have a little background about Nel drip coffee, it might be tempting to have a go at brewing your first cup of Nel drip but as the saying goes nothing worth having in life comes easy, mastering the art of brewing with the Nel drip method takes patience, practice, and dedication. As it is true for manual brewing methods in general, practice is required to achieve control over the pouring process, it takes time and patience, and quite sadly, many people give up on Nel drip coffee before they ever reach the true greatness of coffee that can be achieved using this method.
However, there is no need to give up just yet! The fact that this method has such a huge fan following all over the world, and is loved by so many as the best brewing method to bring out the individuality of a coffee, should be enough to make us feel hopeful. Once you go over the initial hurdle and have gotten used to the process, you will be able to enjoy and brew delicious coffee consistently – not only delicious but a taste that is surprisingly different from the more common paper filter-based pour-over methods.
At this point, to give you a big advantage at the beginning of your journey with Nel drip coffee, we want to introduce you to the device that is the easiest to use and the cheapest (the best of both worlds!) for brewing Nel drip coffee: HARIO Nel Drip filter and holder set.
If you are new to Nel drip coffee brewing, I would personally recommend HARIO without any second thoughts and these are the reason why:
1. HARIO is the most popular device used for this method
2. The handle set is cheap
3. The replacement filter is cheap
4. Cheap overall!
5. The filter is not the disposable one-time-use type. It can be cleaned by washing and sterilized by boiling water so one filter can be used repeatedly. (Do I even have to mention how environment friendly that is)
6. As long as it is well maintained and used with care, one set of the device can be used for a long time which makes it a very cost-effective coffee brewing device.

Features of Nel Filter

1. The flannel filter is thick and durable
2. The conical shape of the filter enables a smooth, consistent pour that is easier to control
3. The handle with the wire loop for holding the filter has a hole on it which makes it easy to remove the filter if you have to change it with a replacement
4. As the flannel filter can be removed from the handled wire loop, only the filter part can be easily removed and sterilized with boiling water
5. HARIO Nel drip set gives a highly stabilized set up for the pour-over so it is very forgiving when it comes to things like minor shaking of the hand during the pour-over
Things to consider when buying
• The package for replacement filters comes as a set of three filters.
• The smaller size ( Brews for 1 to 2 people) costs around
750 JPY (around 7 USD)
• The larger size (Brews for 3 to 4 people) costs around 850 JPY(around 8 USD)
• The pricing of HARIO Nel drip equipment is a lot cheaper compared to other coffee brewing devices and the fact that it is so affordable makes it possible for practically anyone to enjoy the true taste of coffee without having to pay a fortune.
**Important point to check! **
• The diameter of the filter has to fit the size of the wooden handle so please make sure to buy the filter of the right size according to the size of the handle of your drip set.
• I use the size for 3 to 4 people but the idea of large and small for equipment varies from person to person so I think for household use the size for 1 to 2 people would be more suitable.

What it is like to use the HARIO Nel drip set
Brewing the perfect cup of Nel drip coffee using the HARIO Nel drip set does require practice and is not something that will be easy on the first attempt. However, using the equipment itself is not difficult at all and is very easy and simple to set up and start using even by a beginner.
If you are using fresh coffee, you will see a magical thing happen during the pre-infusion or the first pour. When the coffee on the Nel filter comes in contact with the brewing water, the coffee will “bloom”. No words could describe what “bloom” exactly is and how hypnotizing and rewarding it is to watch it unfold in front of you but an attempt can be made by saying that the coffee grinds expand and rise, releasing gorgeous wafts of air infused with the aroma of the coffee around the brewing process. It is an experience like no other.
The details of the brewing method have been explained on the introduction page of MORIHICO's Nel drip equipment. Since the same procedure can be followed using HARIO’s Nel drip equipment, we request you to kindly take a look at that page.
SUMMARY
• Many people are intimidated by the fact that it is difficult to master the art of brewing using the Nel drip method but once you have gotten used to it, you can brew a cup of coffee that is of exceptional quality. Practice makes perfect!
• You can confidently choose HARIO for your equipment if you want to start brewing your coffee with the Nel drip method. It just cannot go wrong.

How to use Nel Drip (suggested measurement)
According to enthusiasts, this method must be done correctly to achieve the exceptional flavor and sensation that a Nel Drip coffee gives. Some say that it can take about 30 years to master the art of pouring over a Nel Drip, but here’s a quick how-to on attempting to use one at home. The technique requires practice, but the steps are pretty straightforward.
You notice some variations in measurements and approaches for how to brew with Nel Drip.
It's like a miso soup recipe in Japan; every family has different way of cooking them.
There is no 100% "right," so I hope this guide gives you a good starting point to find your perfect cup. Remember that what you enjoy the most is the best cup of coffee.
Enjoy!
Grind Recommendation for Hario Nel Drip
Here are most common grinder and recommended setting for grinding for Nel Drip. (If you do not have proper grinder, we grind for you - select "Grid for Nel Drip" option on product page).
-
Baratza Encore: #14
-
Baratza Virtuoso: :#14
-
Capresso Infinity: Fine #4- Medium #1
-
Cuisinart Supreme Grind: #4-#6
-
Bodum Bistro: Drip Icon + 2.5:
Hario Nel Drip 480ml (16 oz)
The Hario Nel Drip, which is the most popular and practical option for this brewing method, comes in two sizes: the 480ml (16 Oz) and the 240ml (8 Oz).
The following enumerates the steps in using the larger model (480ml).
Quick Measurement Guide
25-35 grams of coffee, 480 ml (16 oz) of 95°C (205°F) hot water
Rough guideline - If you fill water until the pink line in the picture below, it is about 480 ml.

Detail Guide
- Put your brewer on the scale.
- Rinse your cloth filter with water. Be generous.
- Swirl the hot water that drained into the brewer to preheat it, and then discard.
- Scoop 25-35 grams of ground coffee onto the filter. Tare out your scale and start your timer.
- Pour about 40 grams (1.5 Oz) of water in a circular motion, swirling alternately inward and outward to allow your coffee to bloom.
- After about 45 seconds, you can start to pour another 90 grams (3.2 Oz) of water.
- At a minute and a half, add another 90 grams (3.2 Oz) of water.
- At two minutes and 15 seconds, pour the final 90 grams (3.2 Oz) of water.
- Swirl leftover hot water in your coffee mug to heat it, and then discard the water.
- Allow all the water in the filter to drain, and then give the brewer a good swirl before pouring coffee into your heated mug.
Hario Nel Drip 240ml (8 Oz)
As for the 240ml (8 Oz) version, here are the instructions for its use.
Quick Measurement Guide
13-18 grams of coffee, 240 ml (8 oz) of 95°C (205°F) hot water
Rough guideline - If you fill water until the pink line in the picture below, it is about 240 ml (8 oz).

Detail Guide
- Put your brewer on the scale.
- Ready the filter by rinsing it with hot water over the wooden collar, preheating the brewer in the process. Empty the brewer after swirling the hot water in it.
- Scoop about 13-18 grams of medium-ground coffee into the filter. Shake it lightly for a more even distribution and to rid it of air pockets.
- Using a kettle with a narrow enough spout for a slow and circular pour, carefully pre-infuse the coffee with 30 grams (1 Oz) of water that has just come off the boil.
- Allow the coffee to bloom for about 20 to 30 seconds.
- Careful not to rinse down the sides of the filter, pour another 210 grams (7.5 Oz) of just-boiled water, keeping the stream on the coffee and slowly moving it in an even outward and inward swirl for about a minute and a half.
- Heat your mug with any leftover hot water. Swirl and discard.
- Let all the water in the filter drain into the brewer. Give the collected coffee a swirl before pouring it into your mug.
If you’re already aware of your preferences in coffee, you can, of course, tweak certain details such as the grind size, water-coffee ratio, brew temperature, etc., to come up with your own ideal cup.

A simple, easy guide to Nel Filter maintenance
Although the Nel drip method is undoubtedly capable of brewing incredibly delicious coffee, opinions like “I cannot recommend the Nel drip method as the maintenance of the equipment is too much of a hassle”, are more common than you might expect. And we are not completely denying that. Certainly, there are coffee brewing techniques with equipment that are easier to clean and maintain.

However, the difficulty of maintenance of Nel drip device can be unjustly over exaggerated as the maintenance of the whole equipment is not so troublesome that you will find it impossible to keep on using it. Besides, once you are hooked to the deliciousness of Nel drip coffee, you would not even feel that it is any extra work because it's all going to be SO worth it. And once you have become a Nel drip lover, there is no going back.
So for all of you who are still determined to have a taste of the best, I am introducing here, a simple way to maintain and take care of your Nel drip filters so you can leave out all that nonsensical maintenance methods on the internet that makes it sound so difficult.
※First things first, whatever you do, NEVER wash your Nel filter with detergent. Nel filter and detergent should not even be in the same sentence! An absolute no-no.
1. Sterilize the Nel filter in a pan of boiling water
2. After it has been sterilized, rinse the Nel filter with water
3. Squeeze the filter strongly to wring out the water
4. Remove any remaining moisture from the filter by placing it between the folds of a clean cloth
If your Nel filter is fresh out of the package, it is important to boil it in boiling water first to remove any glue on the filter that is present from the manufacturing process. It couldn’t get easier than this as all you have to do is to place the filter inside a pot of boiling water. For a completely new Nel filter, you should leave the filter in the boiling water for about 15 minutes.

How to clean and store your Nel drip filter after it has been used for brewing
1. Throw away the used coffee grinds
2. Wash the fine grinds that might be stuck to the filter
3. If you have time, it is better to sterilize it in boiling water after every use (It is also said to be okay to wash it after a few times of use)
4. Store it in a clean safe place inside the freezer or the refrigerator
Maintenance of Nel drip filter is not a hassle, rather it is something that is done out of respect and cares that a brewer feels for the equipment that is used to make coffee.
Detergent should never be used to clean Nel filter: Boil it in water instead
One thing to keep in mind at all times when cleaning the Nel filter is the importance of avoiding the use of bleach or detergent at all costs. The reason we sanitize the Nel filter in boiling water after it has been used is that the flannel filter cannot be washed roughly using soap or detergent. Boiling it in water prevents the fine coffee grinds and oil that comes out of the coffee from accumulating in the fine cotton mesh of the filter. It makes sure that the fabric of the filter does not retain the flavor and oil from previous brewing sessions.
If you compare it to the cleaning involved in other manual brewing methods, Nel filter cleaning can even be considered to be less work as you do not have to worry about cleaning the server and the filter holder.
Where to store your Nel filter
With paper filters, you can mindlessly discard the used filters after every session. However, with Nel drip, we use the same flannel filter repeatedly and that is why it is very important to know where and how to store your precious flannel filter.
If you are a frequent user, it is advisable to store the filter in the refrigerator. If Nel drip is something you do only on special occasions, then you should store it in the freezer, in which case, you will have to let it thaw and be sterilized in boiling water when you take it out of the freezer for use.

Using Ziploc to preserve the wetness of the filter
Although we do not want the Nel filter to be soggy when we store it, we also do not want it to become completely dried out. An easy solution to this is to store it inside a Ziploc bag with a tiny amount of water and put the bag inside the refrigerator.
** Point to note! **
Do not let the Nel filter dry out completely during storage!
Final words on Nel filter maintenance to sum it up
The reason why Nel filter maintenance is considered to be troublesome is definitely the part where you have to boil it in water for sanitization. But speaking from personal experience, soon after you start using it, you will naturally get used to the cleaning process and it won’t feel like a hassle at all.
If you can take proper care of the Nel filter and maintain its cleanliness, it will reward you with clean, delicious coffee free from any off notes or flavor, every single time you use it! At this point you might still be feeling a little hesitant to try out Nel drip brewing but if you choose the HARIO Nel drip set you are surely on the right track and that at a very reasonable price.

Sticking to a traditional manual brewing method like the Nel drip set instead of opting for the easier and newer brewing machines is a classy and refined way to celebrate your unique coffee preferences.

More Videos about HARIO Nel Drip
I thought it might be helpful to see more videos about Hario Nel Drip, so I picked my personal favorite from YouTube here!
Most of the Hario Nel Drip videos are in foreign languages without captions, but these are not, so I hope it is helpful for you.
Blue Bottle Coffee - How To Brew - Hario Nel Drip Set
This video includes:
- The recipe shown is aligned with the more traditional Japanese Kissaten style of brewing with a cloth filter.
- Detailed and easy-to-follow recipe.
Pouring Over Coffee - Home Brew Guide: How To Brew Hario Nel Drip
This video includes:
-
A detailed guide and review of the product.
-
A detailed recipe process.
James Hoffmann - Cloth Filters for Coffee
This video includes:
-
A detailed explanation on cloth filter (discussed as well on how to clean and take care of the cloth)
-
Taste comparison using Nel Drip and V60
BUY YOUR OWN NEL DRIP HERE
• Disclosure: I only recommend products I would use myself, and all opinions expressed here are my
own. This post may contain affiliate links that I may earn a small commission at no additional cost to you.
The commission also supports us in producing better content when you buy through our site links.
Thanks for your support.
- Kei and Team at Japanese Coffee Co.
Get Free Bonus Books

Sign up for free to the Coffee Club to get advice and exclusive articles about how to choose Japanese Coffee, and tips, tricks, and recipes for enjoying Japanese coffee.
About the author
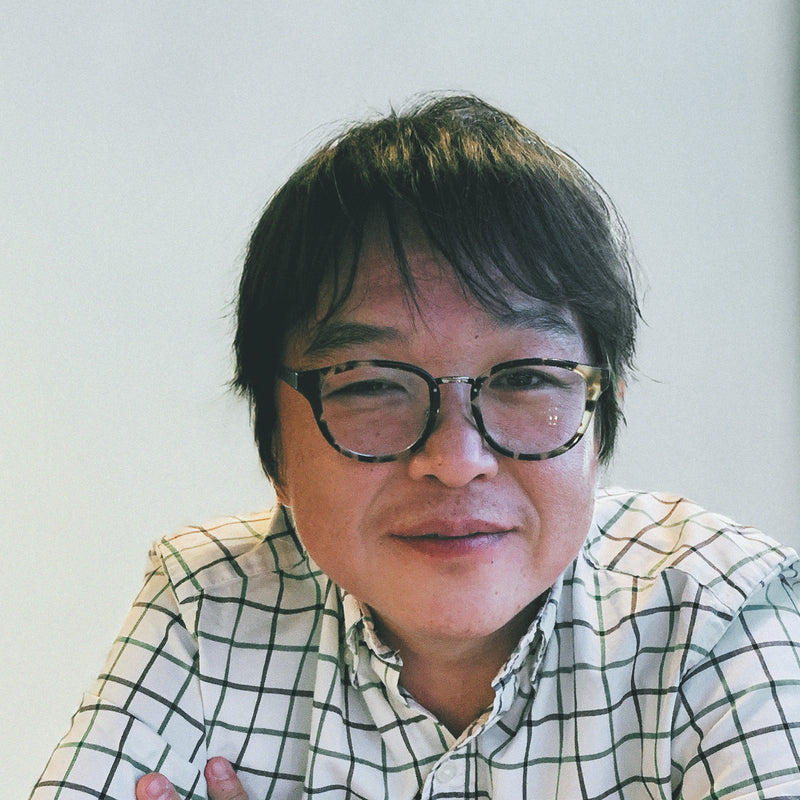
Kei Nishida
Author, CEO Dream of Japan
Certification: PMP, BS in Computer Science
Education: Western Washington University
Kei Nishida is a passionate Japanese tea and coffee connoisseur, writer, and the founder and CEO of Japanese Coffee Co. and Japanese Green Tea Co., both part of Dream of Japan.
His journey began with a mission to introduce the world to the unparalleled quality of Japanese green tea. Through Japanese Green Tea Co., he established the only company that sources premium tea grown in nutrient-rich sugarcane soil—an innovation that led to multiple Global Tea Champion awards.
Building on this success and his passion for Japanese craftsmanship, Kei expanded into the world of coffee, pioneering the launch of Japanese Coffee Co., the first company to bring Sumiyaki charcoal-roasted coffee to a global audience. His dedication to authenticity and quality ensures that this traditional Japanese roasting method, once a well-kept secret, is now enjoyed worldwide.
Beyond tea and coffee, Kei has also introduced Japan’s legendary craftsmanship to the world through Japanese Knife Co., making handmade katana-style knives—crafted by a renowned katana maker—available outside Japan for the first time.
Kei’s journey continues as he seeks out and shares the hidden treasures of Japan, one cup and one blade at a time.
Learn more about Kei


